Chicken Enchilada

Photo Aug 20, 7 28 57 PM (1)
Ingredients:
1 batch of tomatillo salsa
1 lb ground chicken
flour tortillas
cotija cheese
cilantro crema – sour cream blended with juice of 1/2 lime and a splash of heavy cream.  Add chopped cilantro and use to garnish

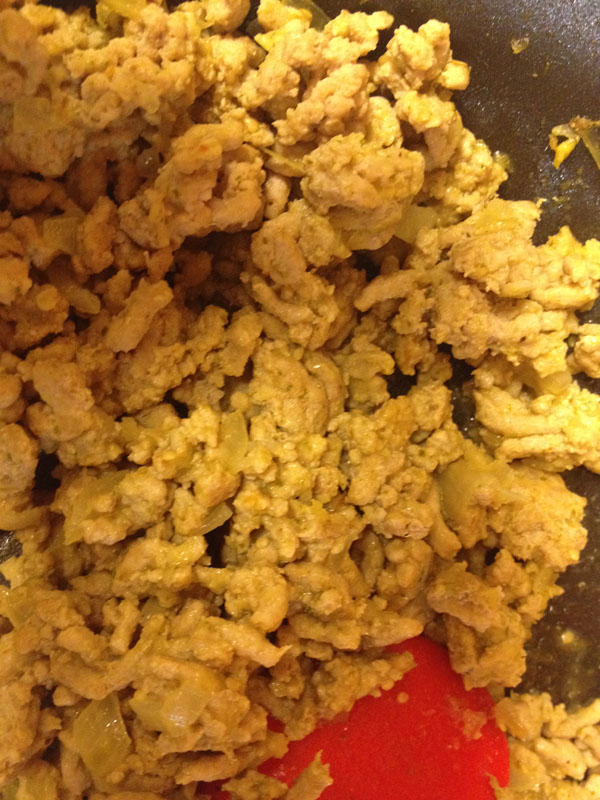
Step 1 – Saute ground chicken. Take off heat and mix in 1/2 cup of salsaPhoto Aug 20, 7 19 22 PM

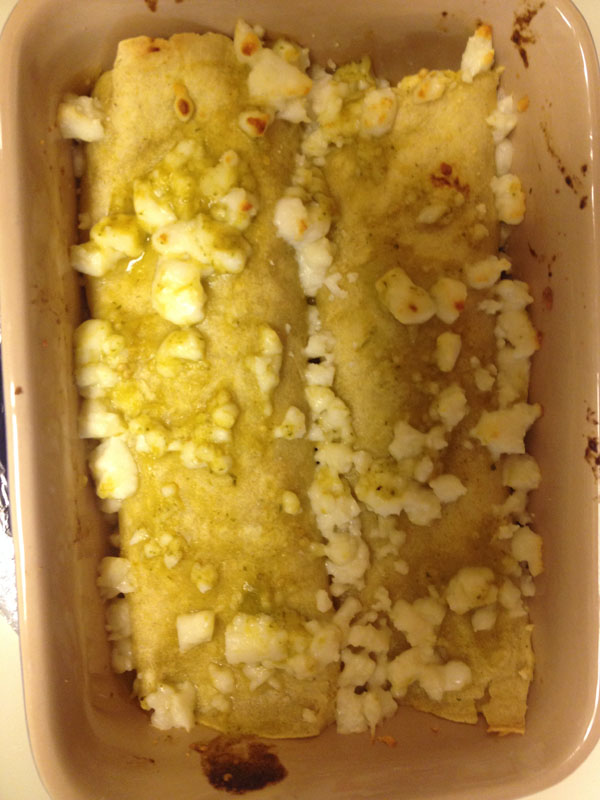
Step 2 – Cover bottom of  baking dish with a few spoonfuls of salsa.  Take 1 -2  tablespoons of meat mixture place in center or wrap and roll.   Place roll seem side down into baking dish and cover with salsa and sprinkle with cheese. Bake at 350 for 10 minutes – till cheese is brown and enchilada is bubbling.Photo Aug 20, 7 19 50 PM

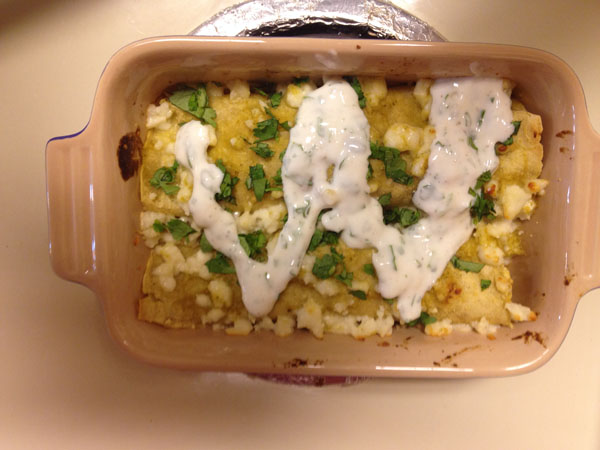
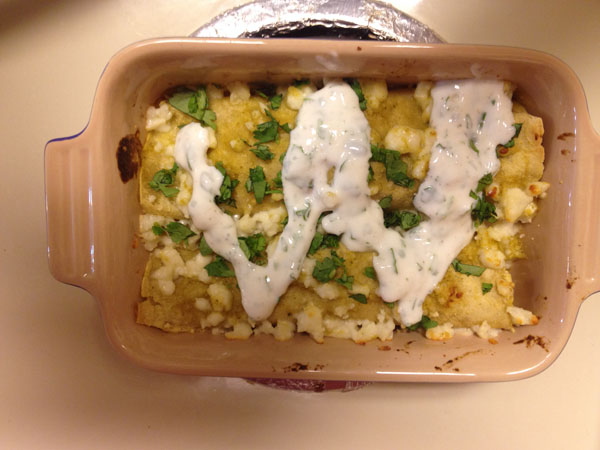
Step 3 Garnish with cilantro and crema to taste.Photo Aug 20, 7 28 57 PM


Tomatillo Salsa

Photo Aug 20, 5 57 29 PM

Ingredients:
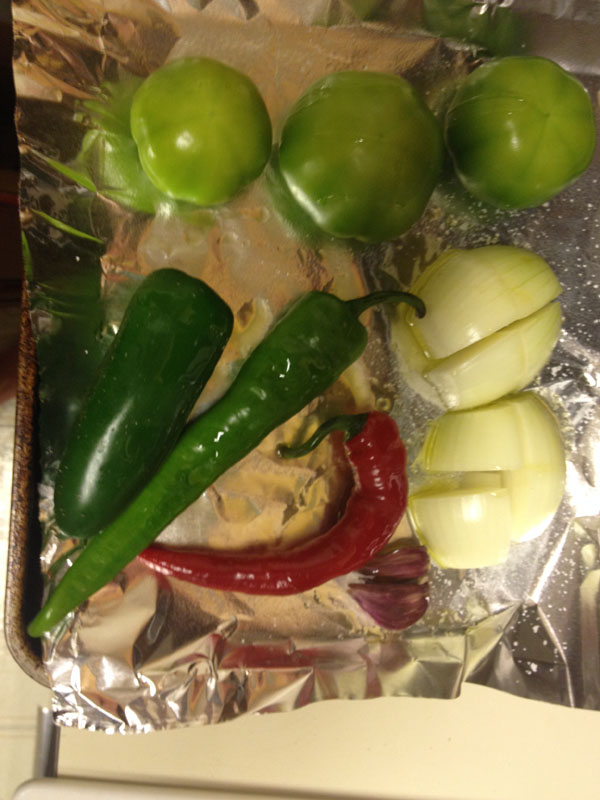
3 Tomatillos
1 Jalapeno
1 small onion
3 cloves garlic
1 serranno chili pepper
1 red chili pepper
olive oil
bunch of cilantro
lime

Step 1 – toss vegetables with olive oil and roast in 350 degree oven for 30 minutes Photo Aug 20, 5 16 34 PM

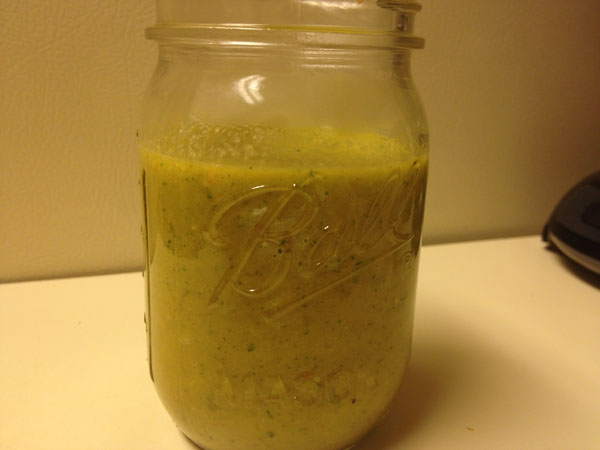
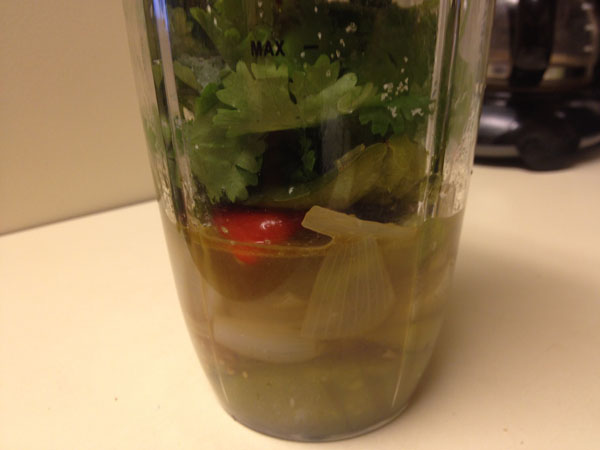
Step 2 – Blend roasted vegetables with cilantro and juice from the lime in blender.

Photo Aug 20, 5 52 43 PM

Store salsa and use as dip for chips, add to tacos, taco salads, or enchiladas

Strawberry Rhubarb Crumble

Strawberry Rhubarb Crumble
6 to 8 serving

strawberry rhubarb 7

Topping:
1 1/3 cup flour
1 teaspoon baking powder
3 tablespoons sugar
3 tablespoons brown sugar
Zest of one lemon
1/4 pound (1 stick or 4 ounces) unsalted butter, softened

Filling:
1 1/2 cups rhubarb, chopped into 1-inch pieces
1 quart strawberries hulled & quartered
Juice of one lemon
1/2 cup sugar
3 to 4 tablespoons cornstarch
Pinch of salt
optional: 1 teaspoon of vanilla paste or extract & 1/4 teaspoon of cinnamon

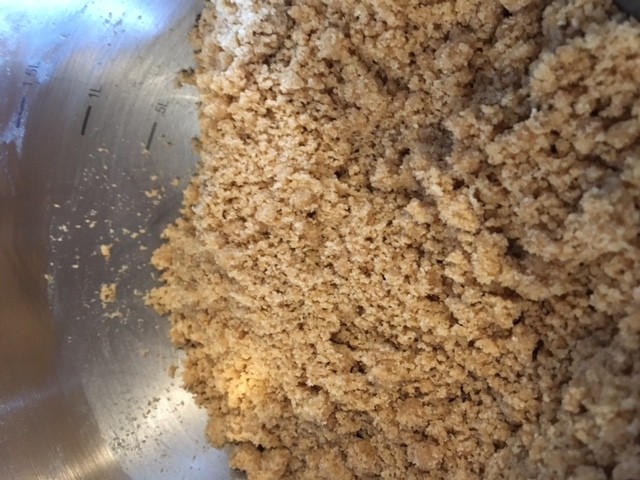
1. Heat oven to 375°F. Prepare topping: In a mixing bowl, combine flour, baking powder, sugars and lemon zest and cut in softened butter. Mix until small and large clumps form. Refrigerate until needed.

strawberry rhubarb 2

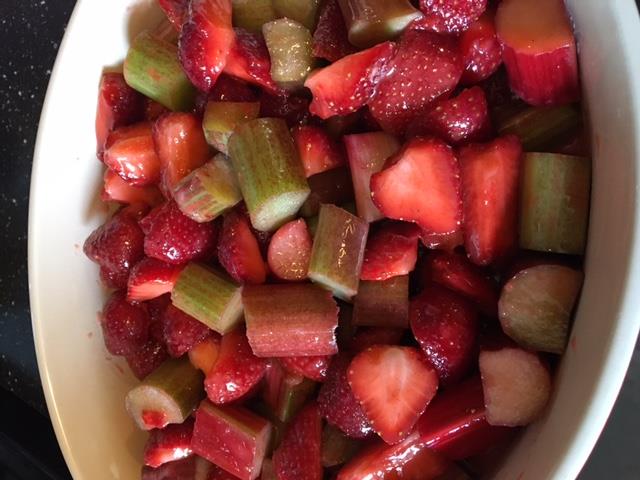
2. Prepare filling: Toss rhubarb, strawberries, lemon juice, sugar, cornstarch and a pinch of salt into 9 inch dish.  I prefer pyrex or ceramic dishes.

strawberry rhubarb 6

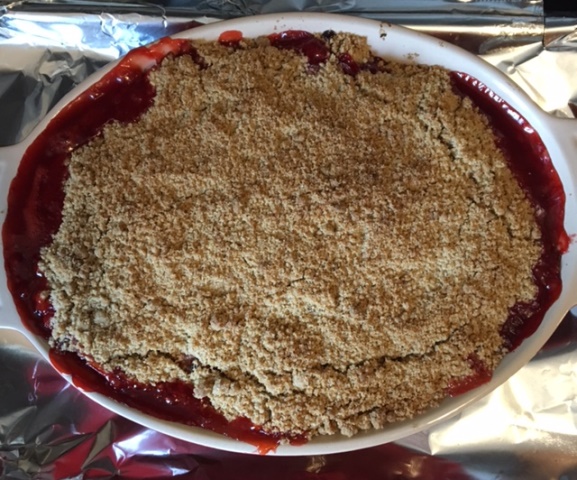
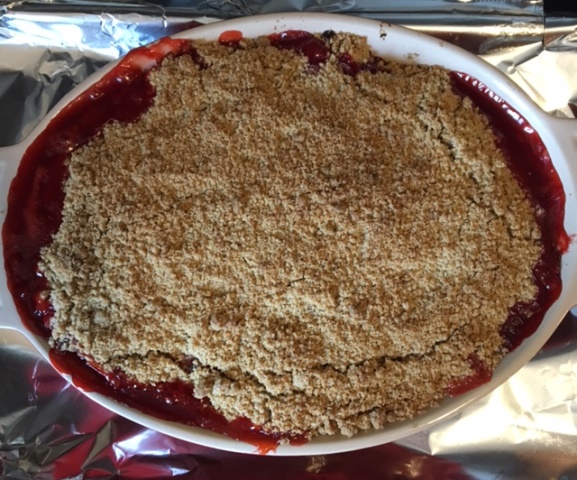
3. Remove topping from refrigerator and cover fruit thickly and evenly with topping. Place dish on a foil-lined baking sheet, and bake until crumble topping is golden brown in places and fruit is bubbling beneath, about 40 to 50 minutes.

strawberry rhubarb 7

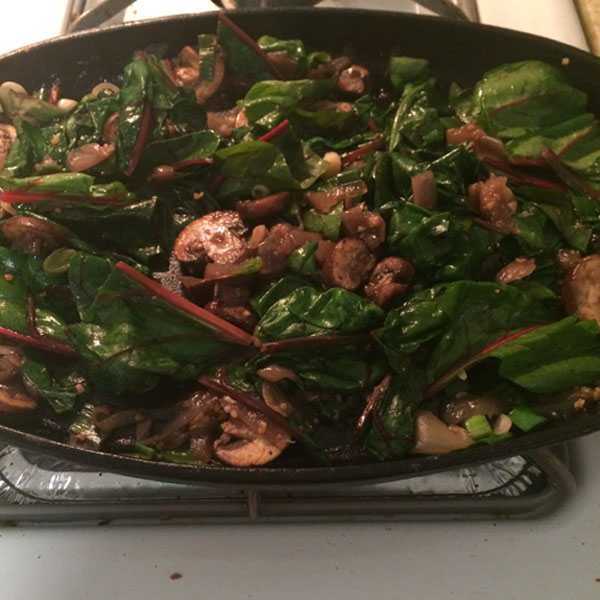
Powerhouse Rainbow Chard Sauté

Photo 6
Powerhouse your diet – add green leafy, yellow/orange, citrus and cruciferous items to our diet.

Why? Reduced risk of chronic disease, plus they are packed with nutrition to fuel our bodies and minds.  But the most important reason is they are easy to use, quick to cook, and oh so tasty.

Also, this is a great prep ahead and cook last minute dish.

You can switch these ingredients for so many variations, whatever is fresh and strikes your fancy at the farmers market or CSA basket. Try substituting chard for beet greens, spinach, chicory, leaf lettuce, watercress, Chinese cabbage, collard greens, kale, or arugula and you’ll still get that same great powerhouse punch.

Check out these other powerhouse foods studied for their nutrient density by the CDC.

Yield: 3 servings

Ingredients:
Rainbow chard, 1 bunch, chopped (~5 cups)
Onion, ½ large, chopped
Green garlic, 2 stalks, sliced in rounds
Baby Bella mushrooms, 2 cups
Salt and Pepper to taste (or ¼ teaspoon each)
Coconut oil, 1 teaspoon
Optional: Orange peel (can be added during sautéing for brightness)

Step 1: Prepare the chard by washing, spinning damp dry, and roughly chopping. Discard the toughest part of the stem; the rest softens a bit in cooking, but some prefer to remove the stem entirely.

Photo 3

Step 2: Chop onion half, slice mushrooms, and slice green garlic stalks into rounds. (We include the green tops of the stalks – yummy.) If you are preparing more items, you could hold ingredients at this step until a few minutes before eating for best flavor.
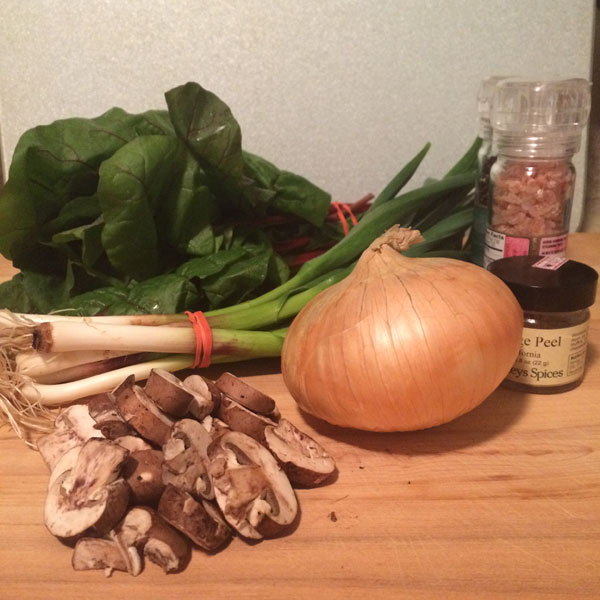
Photo 1

Step 3: Sauté onion, garlic, and mushroom in oil for 5 minutes to soften.

Photo 2

Step 4: Pile on the chopped chard and sauté, watching and turning the chard periodically and cooking until just wilted down and tender – you want to give this a quick cook so that you retain as much nutrition and flavor as possible.

Photo 4

Step 5: Salt and pepper to taste, toss thoroughly. Eat and enjoy.

Photo 5

Serving suggestion – this makes a great breakfast or brunch dish with a poached or fried egg on top.

Nutrition Analysis
Recipe yields 3 servings. Per serving, using ¼ teaspoon salt and ¼ teaspoon black pepper: 51 calories, 8 grams carbohydrate, 2 grams dietary fiber, 2 grams total fat, 1 gram saturated fat, 3 grams protein, 503 milligrams potassium, 329 milligrams sodium, 189 micrograms vitamin A.
Eggplant and Zucchini Lasagna

Fresh vegetables make all the difference to the taste of this lasagna. See it being made and then try it yourself!
Ingredients (serves 4)
2 medium zucchini, sliced lengthwise

1 large eggplant, sliced lengthwise
Optional: 1 large portabella mushroom, cubed
1-1/2 cups pasta sauce or seasoned crushed tomatoes
1 cup mozzarella cheese, cubed or shredded
2 tbsp Parmigiano-Reggiano cheese
1 cup ricotta cheese
1 egg, beaten
1/2 tsp roasted garlic powder (or fresh garlic clove minced)
1/2 tsp onion powder
1 tbsp chopped fresh basil (or 1/2 tsp dried)
1/4 tsp lemon extract (optional, if you like lemon ricotta)
Salt and pepper to taste

Directions
Preheat Oven to 425 degrees. Slice zucchini and eggplant lengthwise into 1/4 inch thick pieces. Salt and pepper them to taste and bake on an oiled baking sheet until tender, about 8-10 minutes per side – but timing varies so watch for doneness. While that is cooking combine the ricotta cheese with the beaten egg, garlic, onion, basil and lemon extract, then salt and pepper to taste. Now create the masterpiece – layering sauce, eggplant, zucchini, mozzarella cheese (reserve 1/3 cup for topping). Repeat process until vegetables are stacked. Top with 1/3 cup of mozzarella cheese and sprinkle with the Parmigiano-Reggiano cheese. Cover with aluminum foil and bake for 25 minutes covered and then 5 minutes uncovered to brown cheese. Let cool 10 minutes to help it set and distribute liquids.

Note: because this is vegetable based there is extra liquid – very tasty liquid. After refrigerating the liquid seemed to magically disappear and the leftovers were even tastier.

Veggie Chicken Foil Packets with Savory Broth

Foil packets are delicious, easy, plan ahead, throw on BBQ or in oven!

Flavor combinations are limitless – you pick what’s fresh and how you want your broth flavored. This variation is OKRAlicious! This recipe serves 4 but is easy to size up or down.

Chicken packet
Ingredients
4 boneless chicken breasts
1 cup cherry tomatoes, halved
1 cup okra, sliced into rounds
1 cup yellow and red peppers, chopped
1 cup green beans, chopped
2 carrots, cut length-wise in strips
1 cup onion, diced
1 cup mushrooms, chopped
4 tbsp Italian dressing
4 tbsp white wine
Minced chives
Fresh or dried herb – fresh is better if you have it
Salt and pepper to taste
Aluminum foil, 4 sheets – extra heavy is preferred

Step 1: Preheat oven to 375.
Chop vegetables and prepare foil by spraying or brushing with oil.
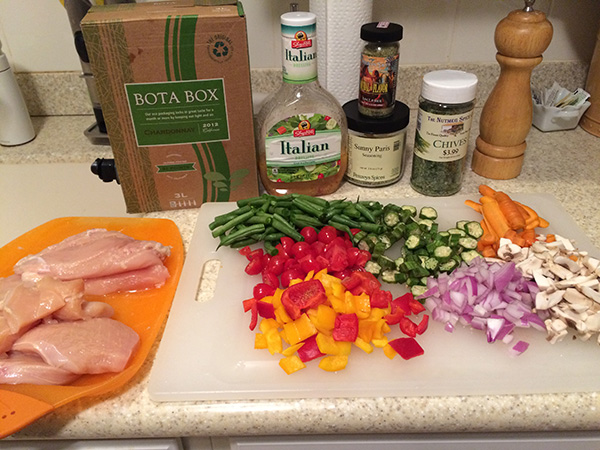
Step 1: Ingredients
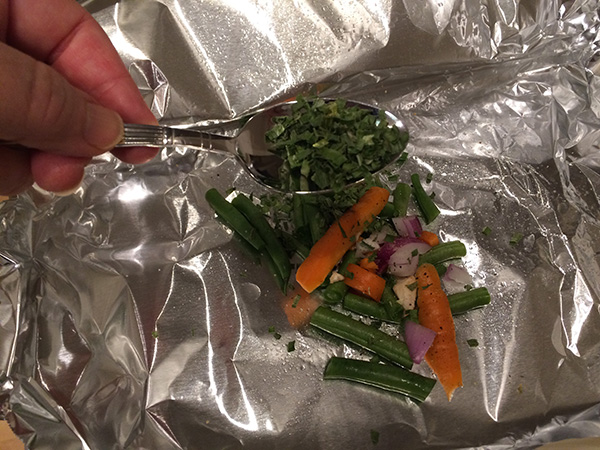
Step 2: Make the vegetable bed by adding 1/4 cup each of green beans, onions, and carrots to sprayed foil sheet. Sprinkle with chives.
Step 2
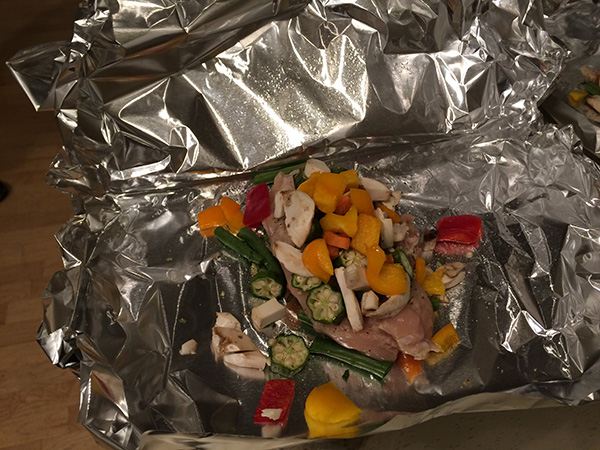
Step 3: Salt and pepper chicken and layer on top of vegetable bed. Top chicken with 1/4 cup mushrooms, peppers and okra. Sprinkle any additional fresh herbs or seasoning you enjoy now, and some more salt and pepper to top layer of veggies.
Step 3
Step 4: Drizzle each packet with 1 tablespoon Italian dressing (or whatever flavor combination you prefer, such as lemon or lime juice).
Step 4
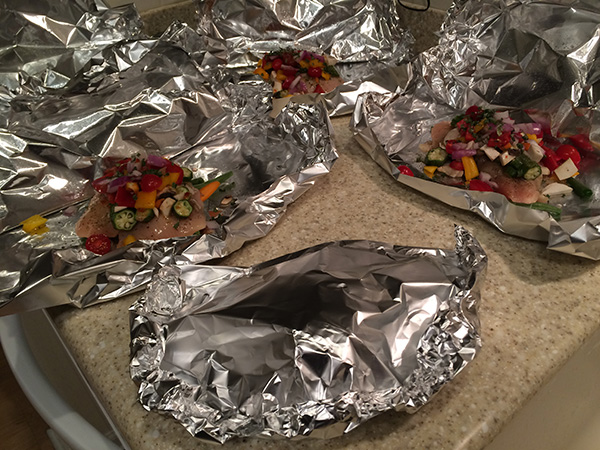
Step 5: Crimp edges together to make the foil packets.Step 5
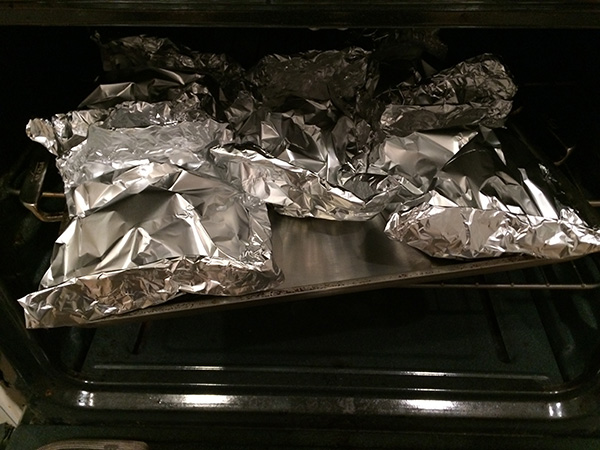
Step 6: Place packets on cooking sheet and put on center rack of preheated 375F oven.  Alternatively throw the packets on the BBQ.
Step 6
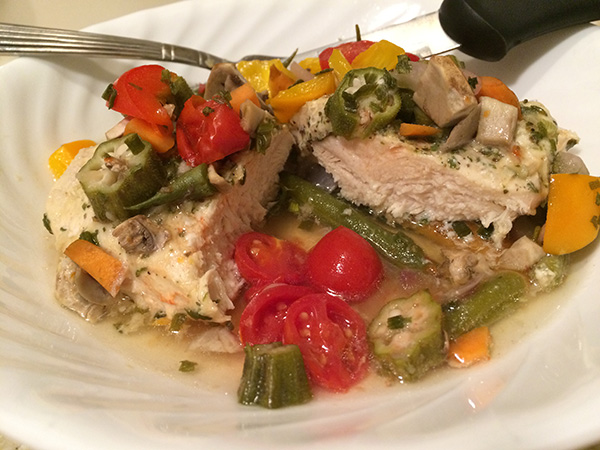
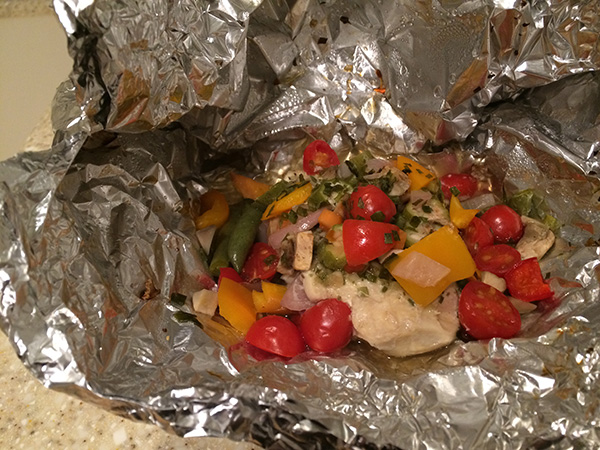
Step 7: Unwrap hot packets carefully and serve in a bowl being careful to pour all the delicious broth from the packets into your bowl – yum. Eat and enjoy!
Step 7

Winter Squash – 3 Ways

Love winter squash? One squash, three different ideas! It’s easy to be creative with an ingredient that’s so versatile. We turned one winter carnival squash into three different recipes – and the fun is each recipe builds on the other, so you can even turn one recipe into the next. Feel free to substitute any winter squash – it will be equally delicious. Pick what you’re in the mood for – or try all three!

Let’s get started!

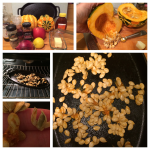
Recipe 1 – Baked Stuffed Squash with Apples and Onions StuffedSquash
Ingredients
1 carnival squash (wash the outside, cut in half, reserve seeds for Recipe 2)
1 apple (we used gala)
Zest of 1 lemon, juice of half a lemon
Quarter red onion, chopped fine
Half teaspoon vanilla extract
Quarter teaspoon salt
Quarter teaspoon cinnamon
Eighth teaspoon nutmeg
2 teaspoons honey
1 teaspoon butter (separated in two pieces)

If baking squash seeds (see recipe 2, below) while prepping this recipe, raise oven temperature to 375°F after removing the seeds from the oven. Otherwise, preheat oven to 375°F.
Wash the carnival squash, apples, lemon, and mince red onion.
Cut squash in half, remove the seeds and use in recipe 2.
Place seeded squash face up on baking pan, lightly salt and then fill with minced onions and apple pieces.
Top each squash half with half a teaspoon of butter.
Drizzle one-quarter teaspoon vanilla extract over each half. Sprinkle halves with cinnamon and nutmeg. Drizzle with honey. Zest the peel of one lemon, sprinkle on each squash half. Squeeze the juice of half a lemon over both squash halves. Lightly salt squash again.
By the time you have prepared these halves the Toasted Squash Seeds will be done. Take out and taste – yum! – either crack open and enjoy seed within (or some people even eat the entire crunchy seed).
Raise the oven temperature to 375°F and preheat.
Bake in preheated oven for 45 minutes, then remove and smell the goodness!
Now time for Recipe 3! (If you have any left after this comes out of the oven!)

***

Recipe 2 – Toasted Squash SeedsToastedSeeds
Ingredients
Carnival squash seeds (from recipe 1 prep)
Salt or other desired seasoning

Preheat oven to 275°F.
Place seeds on a baking sheet, salt or season them, and cook in the 275°F oven for 20 minutes. Don’t worry about removing all of the pulp, it toasts nicely and tastes great!

***

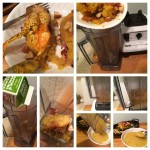
Recipe 3 – Cream of Squash SoupSquashSoup
Ingredients
Finished Baked Stuffed Squash (from Recipe 2, above)
Coconut creamer (or any liquid to thin puree into soup)
Additional salt and pepper, to taste

Remove skin from the Baked Carnival Squash with Apples and Onion.
Place cooked ingredients in blender, or food processor.
Puree and add coconut creamer (or other liquid, such as milk or stock) until it reaches your desired thickness. This can be a thick, creamy soup or thinner consistency, depending on your preference.
Taste and season with salt and pepper, if desired.

Welcome to September!

Did you know that September is Hunger Action Month?

Nearly 50 million people in the United States today are hungry or food insecure. Yet in this country, we will throw away over 133 billion pounds of good food this year. It is time for us to take action — to say that this situation is unacceptable and to do something about it. If we work together, we can solve hunger.

Hunger Action Month is a nationwide campaign to take action on the issue of hunger. It brings greater attention to hunger in the U.S. and promotes ways for us to get involved in the movement to fight hunger in our community.

The gift of a CSA to your local food bank is a great way to help feed the hungry with fresh produce from our farm for a season.

*****

If you’re looking for a great recipe to make with your veggies this month, look no further!

Zucchini, Black Bean and Rice Skillet
PHOTO 1If you have been to a farmers market recently, you probably have seen the beautiful zucchini and corn that is just waiting to be eaten. This is a perfect summer recipe to use summer crops but don’t let the winter snow stop you from making this. Frozen vegetables work just as well.

Ingredients:
Olive oil to coat pan
1/2 cup diced green or red bell pepper
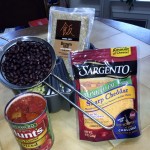
1 can (15 oz each) Whole Black Beans, drained, rinsed
1 can (14.5 oz each) Fire Roasted Diced Tomatoes with Garlic, undrained
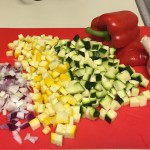
1 ½ cups of quartered, lengthwise-sliced zucchini
PHOTO 23/4 cup water (only if using instant rice)
1 cup instant white rice, uncooked or 1 package of microwavable 90 second rice – cooked for 90 seconds (we used Trader Joe’s brown rice)
1/2 cup shredded Cheddar and Monterey Jack cheese blend
2 cobs of corn
1/2 cup of red onion
2 cloves of garlic, chopped
Salt and pepper to taste
Hot sauce, if desired
Avocado to garnish

Directions:
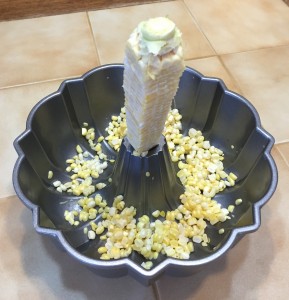
Remove kernels from cobs of corn. (This is easily accomplished by using a knife and a bundt pan.) PHOTO 3
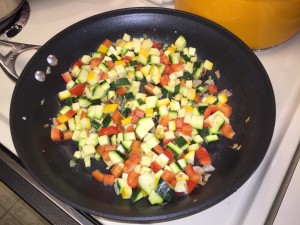
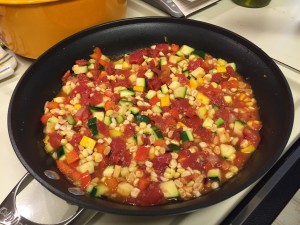
Heat oil in large skillet over medium heat. Add zucchini, bell pepper, onion and garlic; cook 5 minutes, stirring occasionally. PHOTO 4 Add beans, corn, undrained tomatoes and water (if using instant rice). Increase heat and bring to a boil. PHOTO 5
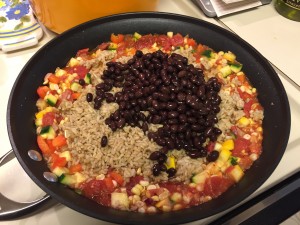
Add rice; stir well. Cover; remove from heat and let stand 7 minutes or until liquid is absorbed. If using 90 second microwavable rice, add rice and cook until the corn and beans are cooked through.PHOTO 6
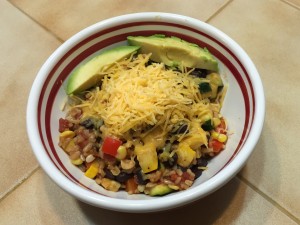
Add salt and pepper to taste. If desired add hot sauce to taste. Sprinkle with cheese. Garnish with avocado slices and enjoy! PHOTO 7

When you support us…

You also support the following organizations that help to feed the hungry in our area:
CT Food Bank
Naugatuck Ecumenical Food Bank
New Canaan Food Bank
New Canaan ABC House
Open Door Shelter of Norwalk
Bridgeport Rescue Mission
Park City Initiative of Bridgeport

Homes For the Brave

We we recently recognized by the CT Food Bank for our contributions. 4,620 meals for hungry people – to just ONE of those wonderful organizations – all thanks to your support!
Lexi_CTFoodBank CTFoodBank

Let’s talk herbs!

So Many Ways to Freeze Herbs
…okay, 5
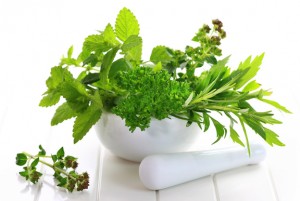
Did you know you can freeze herbs in oil, butter, water, chopped with no liquid? Yes you can! Everyone’s heard of the tried and true method of freezing herbs in water in an ice cube tray, but in oil? Fantastic. Here are several methods for you to try and enjoy – some are best used within 2 months for best flavor, and other 3 to 12 months and just so you are prepared, the colors will darken when you freeze herbs.

  • Mix with butter and freeze: wash, dry, chop herbs, and mix with butter to make herb butter – use any of your favorite herbs! Roll the butter in plastic wrap and refrigerate until hard, then remove butter from plastic wrap and wrap in foil in whatever portion size you prefer, place in freezer container and freeze. Use within 12 months.
  • Ice Cube Method: put 1-2 teaspoons washed, dried, and chopped fresh herb leaves (avoid tough stems) in an ice cube tray, top with water and freeze. Either pat dry/blot your herbs or use a handy dandy salad spinner. When you’re ready to use, defrost cubes, add to salad dressings, tea, or even freeze less in each cube and use to flavor your iced beverages.
    (Note: texture could become mushy so this is a great method for stew, soup, anything where texture is less important, use within 2 months for best flavor)
  • Olive Oil Method: wash, completely dry herbs, and combine herbs with oil in a food processor to make a pureed paste. You will need about 1 cup of fresh herbs to each 1/4 cup of your favorite oil. Fill ice cube tray with mixture and freeze. Do not add water. Remove when frozen into freezer bags and use within 3 months for best flavor.
  • Chop and freeze: Wash and dry, then chop. Freeze in freezer bags without water, try to remove as much air as possible when sealing.
    (Note: these should not be mushy, use within 2 months for best flavor.)
  • Freezing stems/springs/ large leaves: Wash, dry, place on parchment paper on tray in single layer in freezer, and when frozen, remove and put in freezer containers or bags. The best herbs for this are rosemary, parsley, thyme, and bay leaves. (Use within 2 months for best flavor.)

And now for some recipes –

Chimichurri Sauce with Cool Mint Cucumber Water or Icy Mint Green Tea
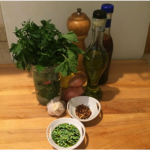
The Argentinians do it with parsley, other Latin American countries do it with cilantro – your biggest question about this crowd-pleasing Chimichurri Sauce might be which herb to try first… fresh parsley, a combo of parsley with mint, add oregano or cilantro? Or kick it up a notch with extra lemon juice, more garlic, or a smidgeon of red pepper flakes? Serve on grilled steak, chicken, fish, lobster, shrimp, scrambled or on top of eggs, as a marinade, even as part of an open-faced grilled provolone cheese baguette! The combinations are endless – let us know your favorites.
With summer’s abundant fresh tomato and cucumber crops only months away, I plan on mixing it in lightly to make a veggie salad. Don’t even start me dreaming about a just-picked zucchini supply … hello sunshine and zippy spiralized zucchini noodles ala chimichurri!
Chimichurri Sauce
Ingredients:
1 cup chopped parsley (or parsley/mint, cilantro)
3 to 5 cloves garlic, minced
1 teaspoon salt
1/2 teaspoon freshly ground pepper
1/4 to 1/2 teaspoon chili pepper flakes (optional)
2 tablespoons fresh oregano or cilantro or mint leaves (optional)
2 tablespoons shallot or onion, minced
3/4 cup favorite oil (or olive oil)
3-4 tablespoons red or sherry wine vinegar
3 tablespoons lemon juice (or add more to taste)
Directions:
Two methods – hand whisk to combine OR put all ingredients in a food processor or blender, pulse until well chopped, semi-smooth but not pureed. Mix in foods, toss on veggies, spoon on meats, top cheese sandwiches, no limit to the great combinations of flavors. Please cover and chill for 3-6 hours or overnight.

Be Cool with Mint Cucumber Water
Sip some Mint Cucumber Water all day long, you will love this light flavor. Mix it up and try some other herbs, or throw in lemon slices, or a slice of fresh ginger for variety, sweeten if desired. Put it in your filtered water pitcher and flavor a big batch or add just to your glass. Eat the herbs or strain them out, any which way you make this combination, you will love it! Combine ingredients, let rest 15 minutes, serve and enjoy.
Fun of this recipe is that you can vary amount of mint from lighter taste to stronger one. Add juice of half a lemon or lime for some added zip.
Ingredients:
1/3 cups fresh mint leaves (rough chopped, or mashed, for a lighter mint flavor use 5 mint leaves)
1/2 cucumber, peeled and sliced thin
1 to 2 quarts to 1 gallon of water (depending on strength desired)

Icy Mint Green Tea
Serve this hot or iced, or kick it up a notch with some added Sake if you want to sit on your home porch and enjoy the evening, no driving allowed!
Ingredients:
3 green tea bags, or 3 bags green jasmine tea (or 2 tsp loose tea for each 8 ounces)
1 quart boiling water
1/4 cup sugar, or 2 tablespoons honey, or stevia to taste
1 bunch fresh mint leaves, washed (about 1/2)
2 cups cold water
1/2 lemon (sliced)

Make the tea first by mixing boiling water and tea, let steep 10 minutes. Combine tea with rest of ingredients except cold water in a pitcher mixing well until sweetener is dissolved, then add in cold water and mix again. Refrigerate and enjoy. If you want to try cold water method, try combining and letting steep in refrigerator for 3 to 8 hours.

Responsible Adult-Alcoholic version: Substitute some Sake for some of the cold water. Best enjoyed on a porch watching sunset, but not if you plan on driving!